Ballot Settings
Before you can begin building your ballot form, you must first configure your Ballot Settings. This essential step allows you to define the rules, permissions, and visibility settings for your ballot. This guide walks you through each setting, explaining its purpose and offering best practices to help you make the most of your upcoming vote.
Required Fields
Fields marked with an asterisk (*) are mandatory and must be completed before proceeding.
Title & Description
1. Form Name*
The Form Name appears at the top of the ballot and in the ballot listing page. It gives voters a quick understanding of the ballot’s purpose.

Best Practices:
Keep it short and clear.
Use concise wording that reflects the ballot’s intent.
For recurring events (e.g., annual elections), include the relevant year.
2. Description
This section is displayed above the ballot and on the ballot listing page. It provides a summary of the ballot’s purpose and basic instructions (this is not where the ballot itself is built. See Ballot Builder for that).
A brief overview of the voting process.
Simple, easy-to-follow guidance for voters.
Legal or overly technical language.
Detailed instructions better placed elsewhere in the app.
Ballot content such as candidate names, motion text, or voting options. This should be added in the Ballot Builder area, not in the description field, to avoid confusion.
Voter Permissions & Access
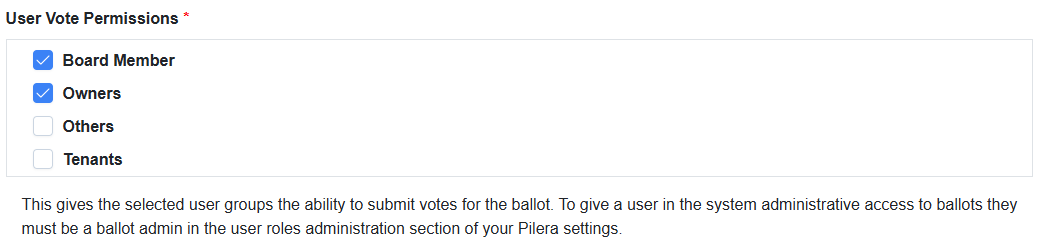 User Vote Permissions
Specify who in your organization can vote on this ballot.
Important Note:Form Restrictions
Enabled: Only one vote per unit is accepted.
Disabled: No limit on how many votes an individual can submit. This is ideal for informal polls or surveys where collecting multiple responses per unit is acceptable or encouraged.
Secret Ballots

Two separate, un-linkable data sets are maintained to ensure privacy; the platform never links the voter’s identity to their selections. This method allows votes to remain confidential while still maintaining the accuracy of results.

Related Articles
How to use unit weight/percentage of ownership in voting
In many organizations across the US, including homeowner associations, cooperatives, partnerships, and corporations, voting power is often based on unit weight or percentage of ownership rather than giving each member or shareholder an equal vote. ...How to Add a Terms & Acceptance to a Ballot & Examples
If you want to add Terms and Conditions to your ballot, you’ll find the process simple and seamless. In this article, we’ll show you exactly how to do it. When setting up your ballot, you can add a Terms and Conditions field directly from the Ballot ...Enforce E-Voting Opt-In - Ballot Setting
What is Voting Preferences? Voting Preferences is a community-level feature that gives residents control over how they participate in electronic voting. When enabled, it unlocks the following capabilities: When Voting Preferences is enabled: Voters & ...Ballot List Page
The Ballot List page provides a centralized location to view all your created ballots. From here, you can manage settings, make edits, monitor participation, and access ballot results. 1. Selecting a Community Use the Community dropdown at the top of ...How to Send a Ballot Announcement
Follow these simple steps to send out a ballot announcement via Ballot Bliss. Note: Ensure you've already created your ballot before proceeding. 1. Navigate to Communications: From your Ballot Bliss Dashboard, click on “Communications” in the ...